A trellis net is one of the simplest yet most effective tools you can use to dramatically improve plant structure, canopy uniformity, and overall yields. Whether you’re growing cannabis in a tent, room, or greenhouse, a trellis net helps guide branches outward instead of upward—maximizing light exposure and supporting heavy flowers later in the grow.
Trellis nets are widely available at local garden centers, online grow shops, and are often included in grow tent kits designed specifically for indoor cannabis cultivation.
What Is a Trellis Net?
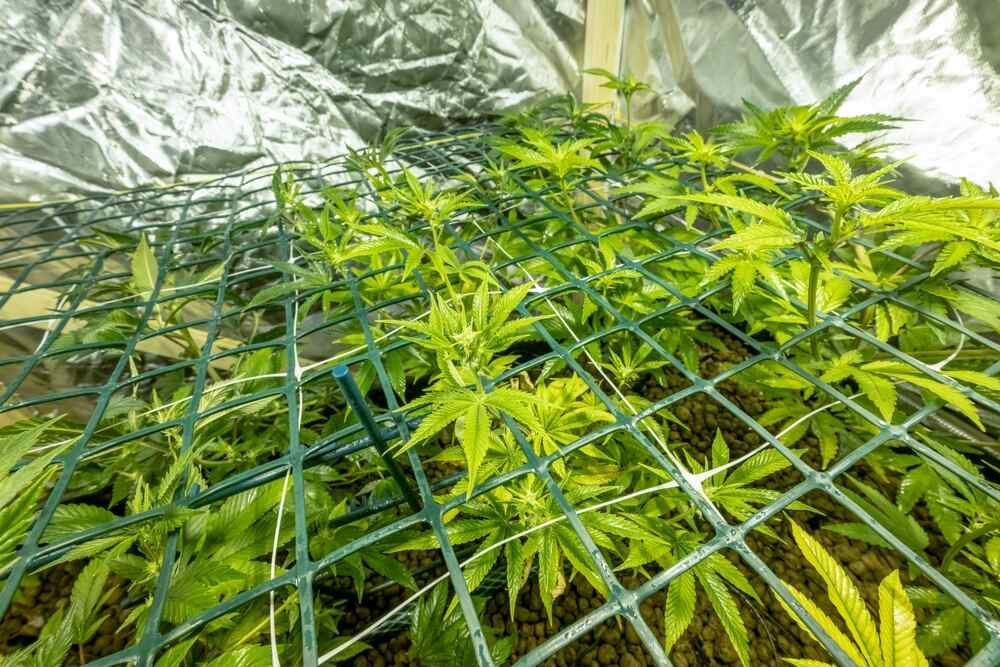
A trellis net is typically a grid made from nylon, plastic, or elastic cord that stretches horizontally above your plants. The grid spacing is usually between 3.5”–6” squares, allowing you to gently guide branches into open spaces as the plant grows.Its primary purposes are: Even canopy distribution Structural support Improved light penetration Better airflow
In cannabis cultivation, trellis nets are most commonly associated with SCROG (Screen of Green) growing methods, but they’re useful far beyond that single technique.
Why Trellis Nets Matter for Cannabis Grows
1. Even Canopy = Better Light Efficiency
Cannabis lights work best when the canopy is flat and uniform. A trellis net allows you to spread branches outward so that:Light hits more bud sites Lower growth isn’t shaded out Energy is distributed evenly across the plant This is especially important for LED grow lights, where optimal distance from the canopy directly affects yield and terpene production.
2. Stronger Branch Support During Flower
As plants transition into flower, buds gain weight quickly. Without support, branches can:
Bend excessively Snap under pressure Lean into neighboring plants A trellis net acts like a safety net, keeping colas upright and properly spaced.
3. Improved Airflow and Disease Prevention
By spreading branches apart:
Air moves more freely through the canopy Humidity pockets are reduced Risk of mold, mildew, and bud rot is lowered This is particularly valuable in dense indoor grows or high-humidity environments.
How to Use a Trellis Net (Step-by-Step)
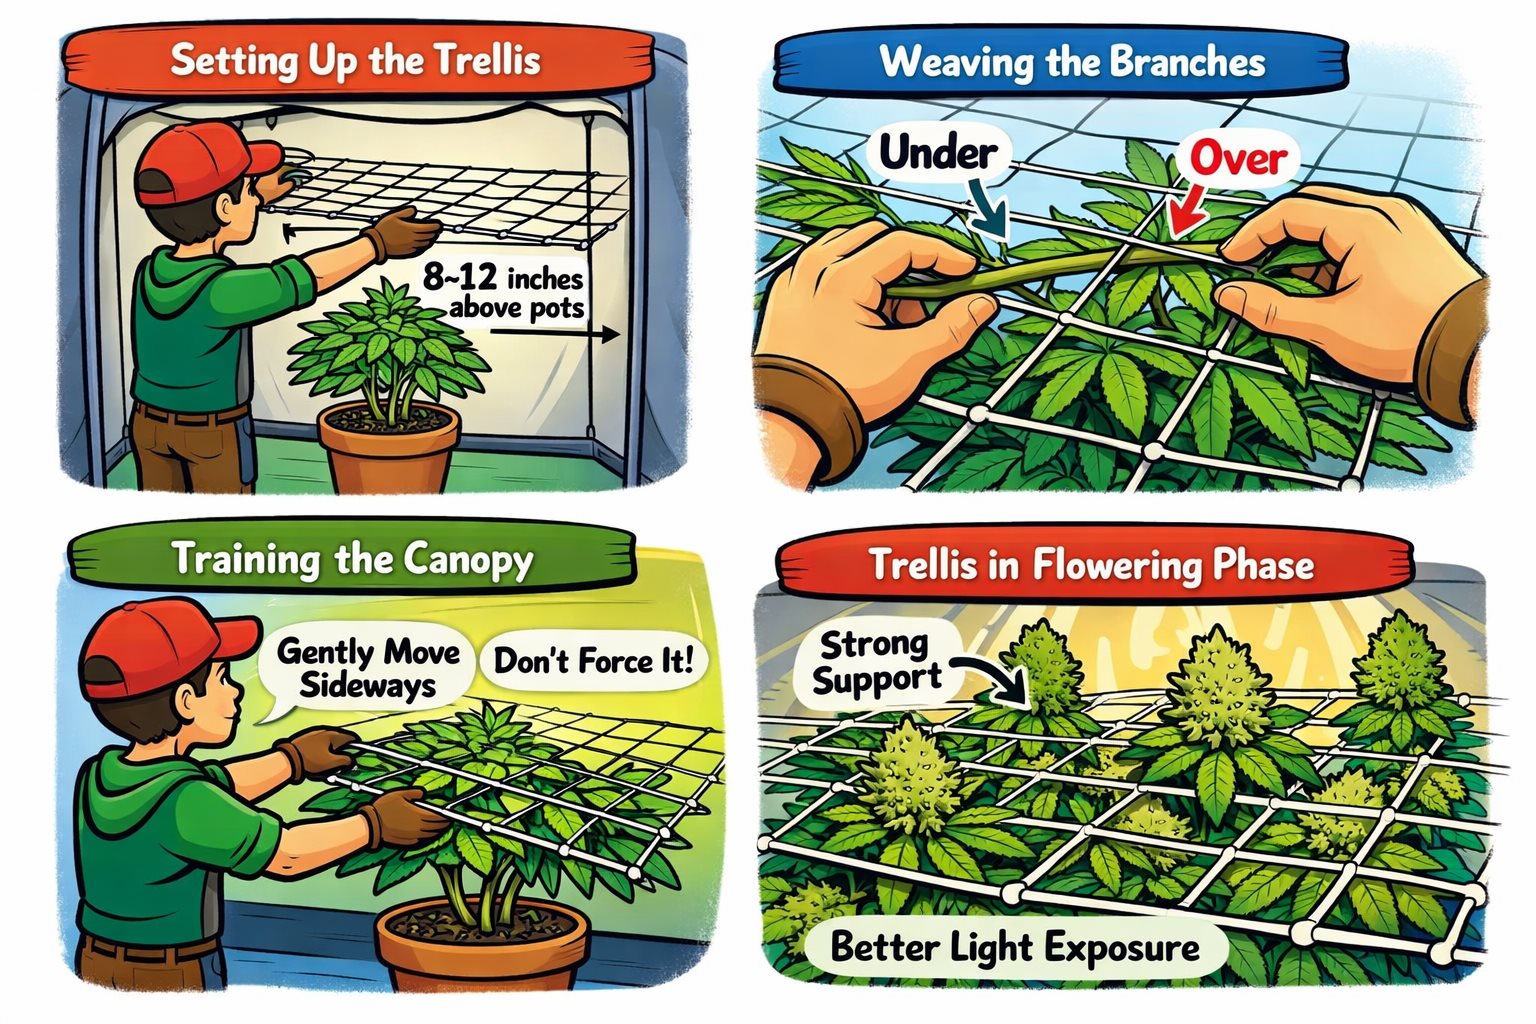
Step 1: Install at the Right Height
Vegetative stage: Install the trellis 8–12 inches above the pots Flower support (second net): Optional second net 6–10 inches above the firstMount the net securely to tent poles or wall anchors so it stays taut.
Step 2: Start Training Early
As branches grow through the net:
Gently pull each branch sideways into the next open square Avoid forcing or sharply bending stems Train gradually over multiple days This technique encourages lateral growth and creates a wide, flat canopy.
Step 3: Continue Adjusting Until Flower Stretch Ends
Most growers stop active training:
1–2 weeks into flower After the main stretch phase finishes After that point, the trellis becomes primarily structural support.
Common Trellis Net Myths (and the Truth) ❌ Myth 1: Trellis Nets Are Only for Advanced Growers
Truth: Trellis nets are beginner-friendly. If you can gently move a branch, you can use a trellis.
❌ Myth 2: Trellising Will Stress or Damage Plants
Truth: When done gradually, trellising is low-stress and often results in stronger, healthier plants.
❌ Myth 3: You Must Use SCROG to Use a Trellis
Truth: Trellis nets work great for: Sea of Green (SOG) Multi-plant grows Autoflowers (with gentle handling) Flower-only support
❌ Myth 4: One Net Is Always Enough
Truth: Many growers use two trellis nets—one for training and one for flower support—for optimal results.
Continue Learning
New to growing cannabis? Explore more step-by-step guides covering germination, vegetative growth, flowering, harvesting, drying, curing, nutrients, lighting, and common plant problems.
Start Tracking Your Grow the Smart Way
Join growers using PLNTRK to track plants, log data, monitor VPD, and improve yields with powerful tools designed for modern cannabis cultivation.
Gallery